

Corridor mapping missions for roads, rails and power lines
Linear sites don't fit a survey grid. Draw the route instead — a road, railway, pipeline, river or power line — and the planner flies parallel passes that follow every bend, covering the corridor width you ask for. Elevated subjects can be tracked at a constant clearance above them.
Draw the route, get the corridor
Trace the centreline (or import a KML / GeoJSON line) and set a corridor width: 0 flies one line straight along the route; anything wider adds parallel passes using your side overlap until the corridor is covered from both sides. The passes follow the bends rather than cutting across them, and two guarantees hold everywhere: every turn vertex is photographed straight down, and oblique shots rotate with each segment's own bearing — no misaligned frames where the route changes direction.
Power line inspection at constant clearance
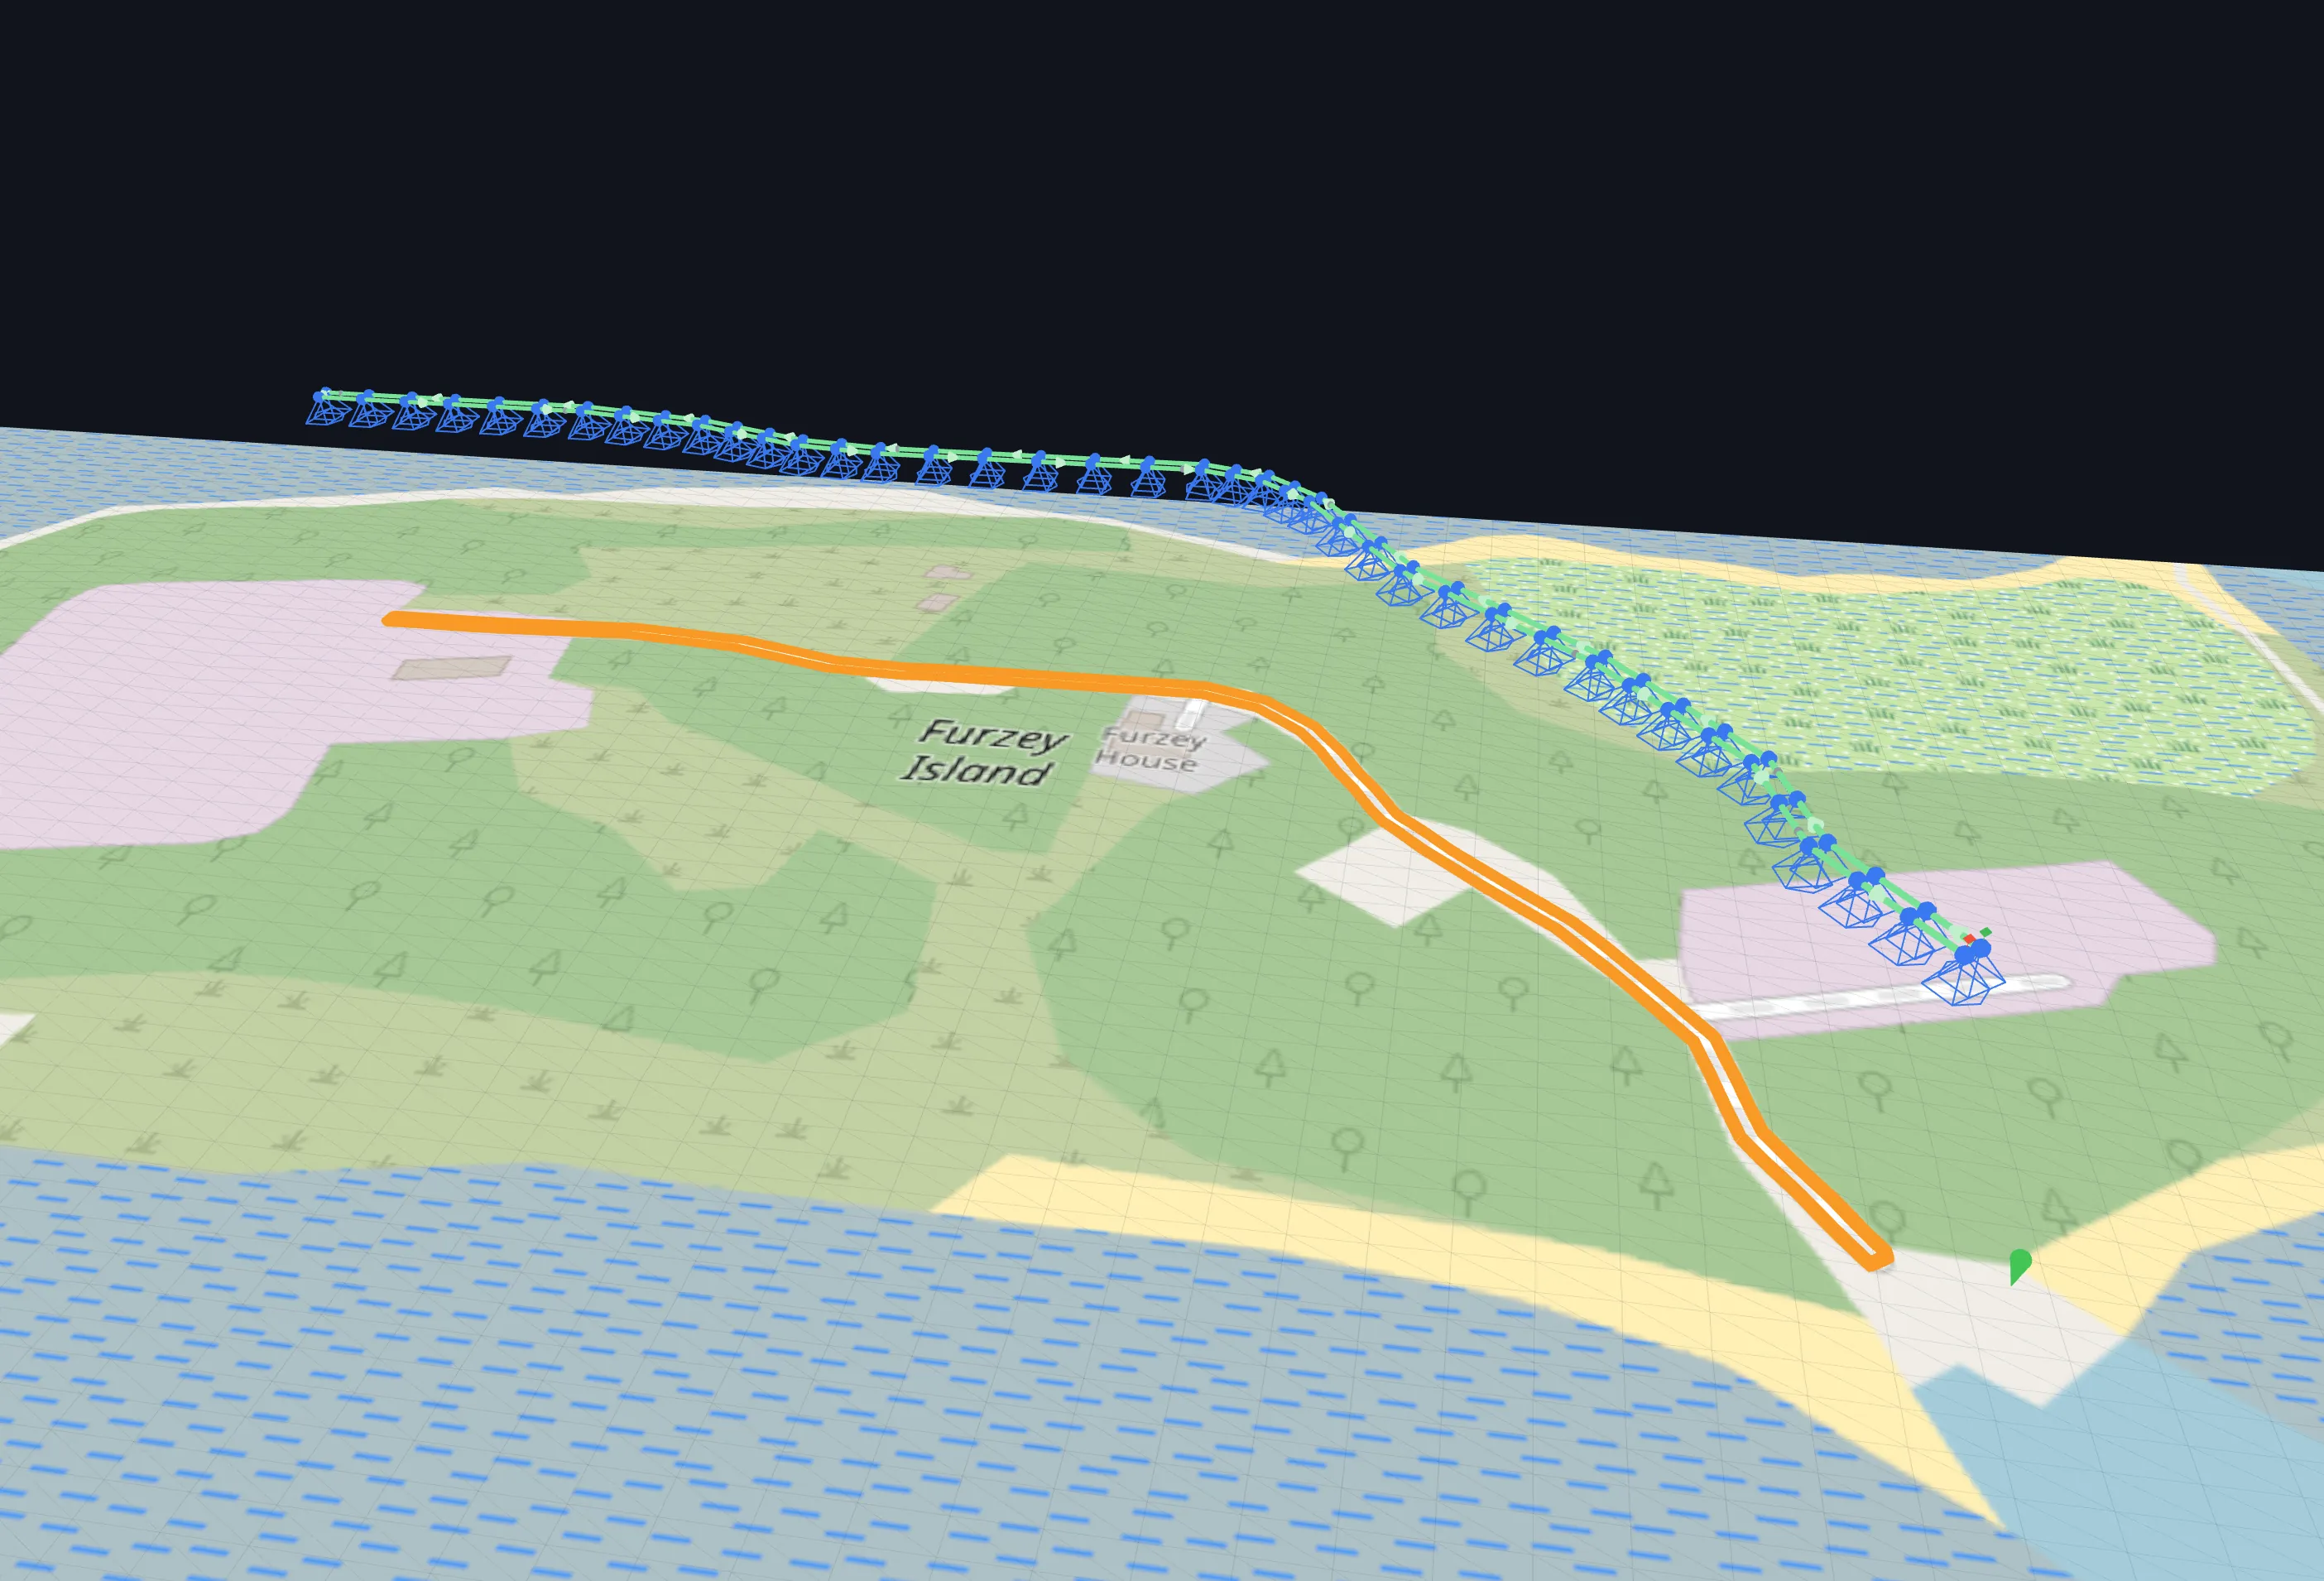
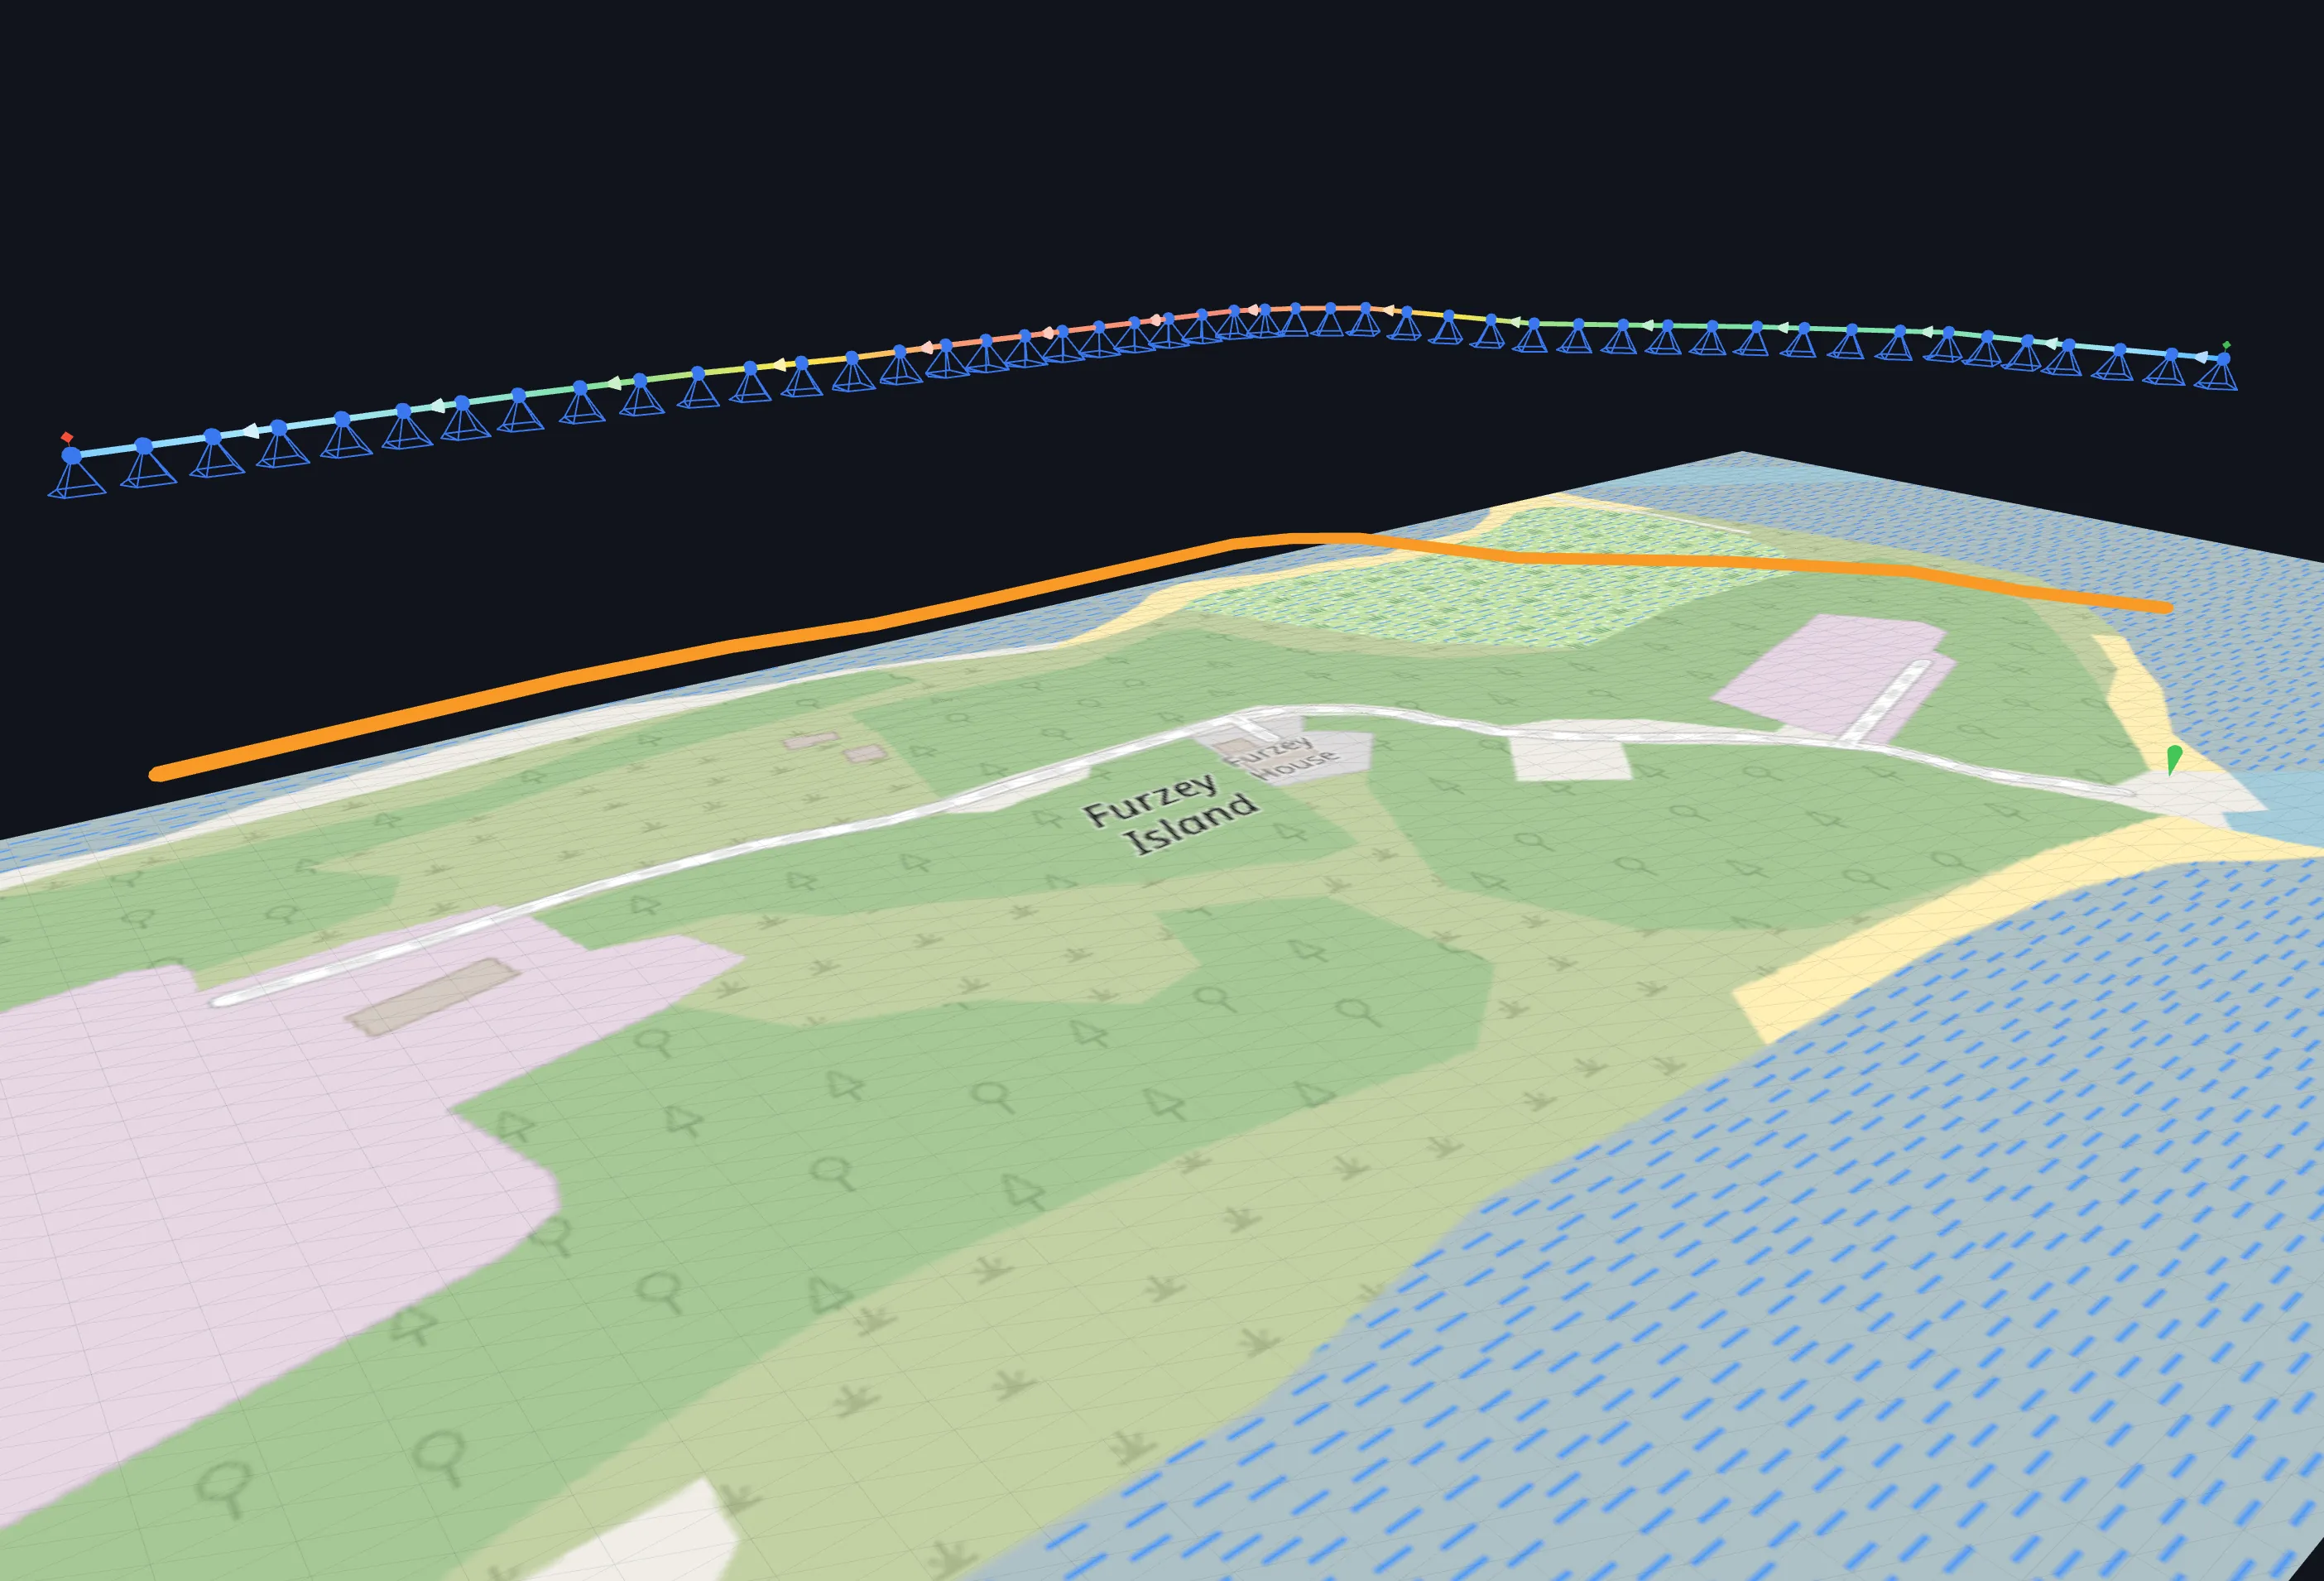
For elevated subjects, set the corridor height — how far above the ground the subject runs — and a clearance above the subject, and the drone follows the wires end-to-end at that clearance, keeping the sampling distance on the subject (not the ground) constant the whole way. Per-vertex height offsets handle sag between towers and pylons of different heights.
Terrain follow along the route
Ground-level corridors use Terrain Follow like any mapping flight: each waypoint's height comes from the elevation beneath it, baked into the mission the way consumer DJI drones fly (relative to take-off). Elevated corridors follow the subject's height instead — that behaviour is inherent to the mode. Either way, a local bare-earth DTM can refine ground heights beyond the ~30 m global data, parsed entirely in your browser.
Sanity-check the route against the real world
Trace the route on your own GeoTIFF orthomosaic instead of dated satellite tiles — current imagery, far higher resolution, so the centreline follows the road that's actually there. Better still for elevated subjects: fly a quick oblique pass over the corridor first, mesh it in WebODM or Metashape, and load the result as a 3D Model Overlay. The model appears seated on the terrain in the 3D preview, so you can visually confirm the passes follow the line of pylons and keep clear of trees and wires before take-off. The overlay is a visual reference — it never changes the generated route — and both files are processed entirely in your browser. More on planning with real-world context →
Export and fly
Set GSD or altitude, front and side overlap, and pick waypoint or interval capture. The start point is one of the corridor's ends — your choice — and the export is a standard DJI KMZ (WPML) for the Mini 4/5 Pro, Air 3/3S, Mavic 3 series, Mavic 4 Pro or Lito X1 (Matrice 300/350 RTK, Mavic 3E/3T/3M and Inspire 3 supported via DJI Pilot 2), with an experimental Litchi CSV option in waypoint capture. Long corridors split automatically into numbered flights at your waypoint cap.
Corridor missions, asked and answered
Can I follow power lines at a set distance above the cables?
Yes — set the corridor height to the subject's height above ground and a clearance above it, and the flight follows the elevated subject end-to-end at constant clearance and constant sampling distance. Per-vertex height offsets handle sag and towers of different heights.
How wide can the mapped corridor be?
Width 0 flies a single line straight along the route; any larger width adds parallel flight lines using your side overlap until the full corridor is covered from both sides of the centreline.
Do photos stay aligned when the route bends?
Yes — each segment uses its own travel bearing, so oblique shots rotate with the corridor, and every turn vertex is always photographed straight down. The passes follow the bends rather than cutting across them.
Other mission types
Plan your first corridor flight
Create a free account, draw a route and export a mission in minutes.